When it comes to Android Emulators, Bluestacks is the first name that would come to your mind. Bluestacks is one one of most reliable and most popular Android Emulators developed for Windows and Mac. It lets you simulate Android OS on your PC and lets you use apps designed for Android on your more powerful computers. The most valuable advantage of using Bluestacks is its ability to root Android without any physical damage or warranty violations. So without any further ado, let’s have a look at some of the easiest ways to Root Bluestacks 3 for Android so that you can enjoy your Android experience in the way you want to.
Even though Bluestacks App is well coded and error-free, its UI has some limitation that created the need for Some of the Best Bluestacks alternatives. These alternatives work same as Bluestacks and are lightweight and easy to use. Before moving further, let’s have a look at some of the most common advantages and disadvantages of Rooted Android Device/Emulators.
Advantages of using Rooted Android Devices/Emulators
- Lets you remove pre-installed bloatware and OEM apps.
- Better battery life and performance.
- Ad-Blocking for all apps in just a single click.
- Lets you install any incompatible app on any device.
- You can also manage your SOC clock speed and try some random experiments.
Disadvantages of using Rooted Android Device/ Emulator
- You won’t be able to able to claim warranty services from most of the manufacturers.
- Vendors won’t be able to push updates to your Rooted device.
- In the worst case, your device may be bricked.
Also Read:10 Best BlueStacks Alternative You Should Try in 2018
Steps to Root Bluestacks 3 for Android
The method listed below is tested for Bluestacks 3 (a.k.a Bluestacks Gaming Platform) but it will also work for other versions like Bluestacks 2 and Bluestacks 3N. Before proceeding on how to Root Bluestacks 3 for Android, you need to download following software on your PC.
Software Requirements:
Steps To Root Bluestacks
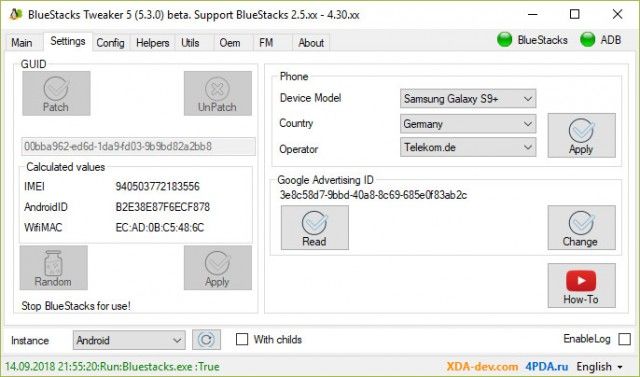
- After downloading the above apps on your PC, extract the .zip file and run the program with Administrator permissions. Running the application with Administrator permission lets you complete the process without any errors. Once the installation process is over, you will see a screen like this.
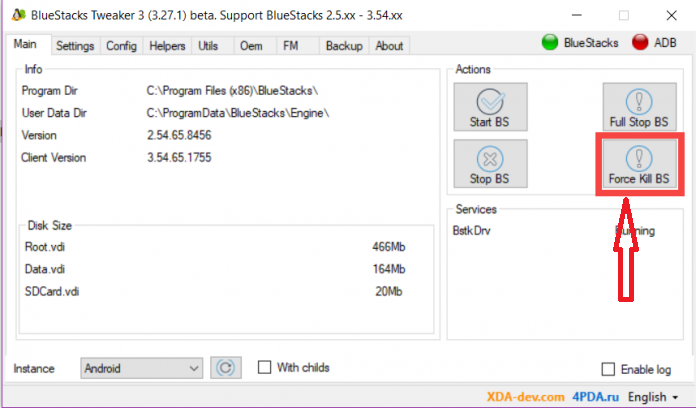
- Before moving further, you need to completely stop Bluestacks running on your system. To do so, click on Force Kill BS to kill Bluestacks and all its process.
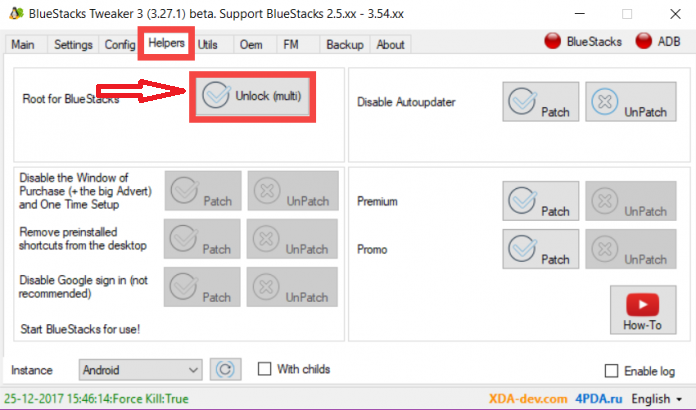
- Click on Helpers Tab at the top navigation bar and click on Unlock(multi) button.
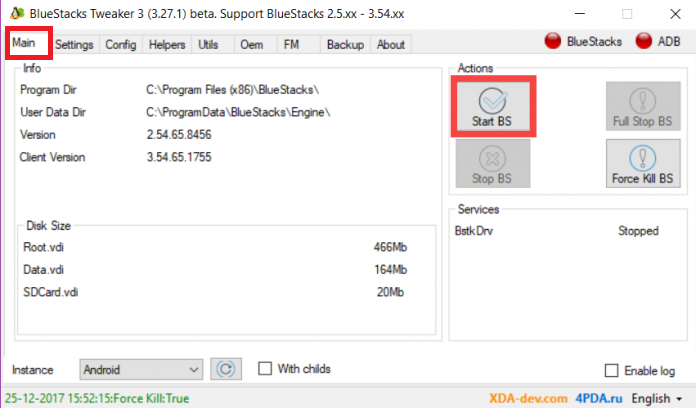
- Now, go to Main Tab and click on Start BS to start Bluestacks.
- Again goto Helpers Tab and click on Patch to start the rooting process. Now the tweaker app will start rooting your Bluestacks and the process will take a few moments.
- Your Bluestacks will be rooted once the process is successfully completed. You can check the root status by installing any of the Root Checker apps from Play Store.

- Download SuperSU from Google Play Store. After the installation process is over, restart Bluestacks and open SuperSU.
- You will screen a screen like this which confirms that your Bluestacks has been rooted. Now you can easily run Android apps which requires root permission without worrying about Warranty violation of physical damage to the device.
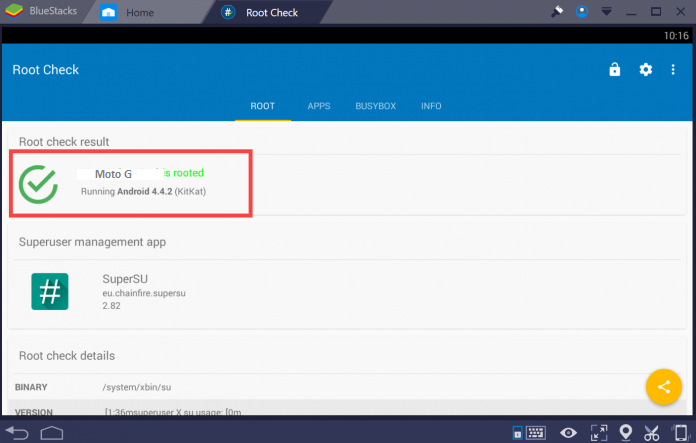
Image Source: XDA Developers
Also Read: 10 Best BlueStacks Alternative You Should Try in 2018
Wrapping Up
We all know that Rooting your device lets you discover the full potential of Android. But most of the mobile manufacturers restrict users from rooting their device or else they won’t provide the warranty for the product. If something goes wrong during the Rooting process, chances are that your device may even get bricked. So using Bluestacks comes out to be the best alternative. There are many methods to root but we have presented one of the simplest and easiest way to Root Bluestacks 3 for Android. If you still have any queries or facing difficulties during the rooting process, do let us know in the comments section below.


