


Typing in your own handwriting is pretty easy.
Type In your own handwriting Just by following the steps mentioned below. You can create your own font with this trick and use it on any device.
Step 1. Print the template given in the link and fill it properly.
Do not use a pen or a pencil to fill the template. Use a marker or sketch pen! Also, try to write the letters within the grey boundaries only. If your letter goes out of the grey box then that letter will not be recognized.
Step 2. Scan the Template at 300 dpi in greyscale
Note: Don’t make Colour Scan of the template.
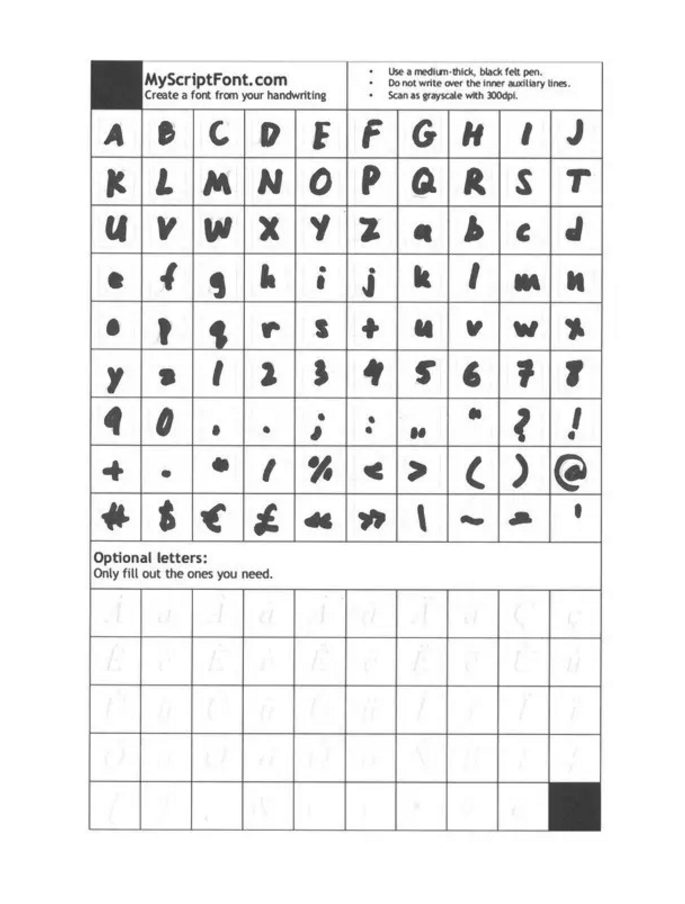
When you are done with step 1, Scan this Template at 300 dpi in greyscale. Scan it with real Scanner only. If try to use some mobile app such as Camscanner or some similar apps, that will not work, believe me, I tried it myself and got failed.
Step 3: Upload the template to MyScriptFont.com and download the TTF/OTF file

After uploading your template to the MYScriptFont.com you will get the font file. Then download the font file in TTF or OTF format. Actually, OTF is newer version so I’ll recommend you to download the file in TTF format as it supports more tools.
Step 4: Install your new font
For Mac OS X users, open Font Book then File > Add Fonts (or command + O).
For Windows users, click Start > Control Panel > Appearance and Personalization > Fonts. Then click on File > Install New Font.
And here you go. Now You can open any of the text-based Application your desktop or laptop and you can type in your own handwriting. This trick is very useful for the students and the writers.


